
Few desserts capture the feeling of home quite like a warm, homemade apple pie. With its flaky, golden crust and sweet-tart, spiced filling, it’s a timeless classic that’s perfect for holidays, family dinners, or simply satisfying a craving. While apple pie has a reputation for being tricky, especially the crust, it’s actually very achievable with the right technique. In this guide, we’ll walk through every step, from choosing the best apples to achieving that perfect golden-brown finish.
how to build muscle tag: The Complete Science-Backed Guide for 2026
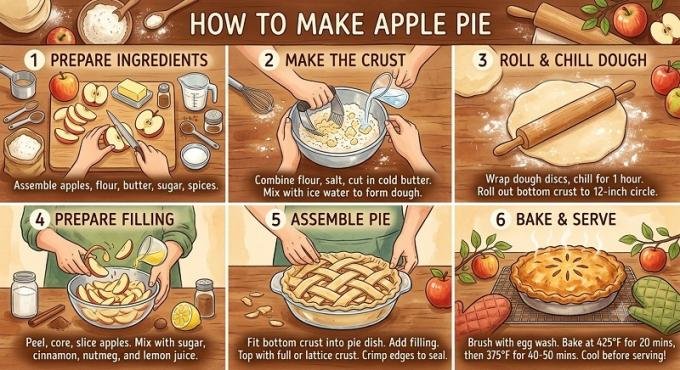
Why Homemade Apple Pie Is Worth the Effort
Store-bought pies simply can’t compete with the flavor and texture of a homemade version. When you make apple pie yourself, you control the sweetness, the spice level, and the quality of every ingredient. You can also customize the crust, whether you prefer an all-butter version for maximum flakiness or a butter-shortening blend for extra tenderness. Most importantly, nothing beats the smell of a fresh apple pie baking in the oven.
Choosing the Best Apples for Pie
Not all apples are created equal when it comes to baking. The best pie apples hold their shape during baking and offer a good balance of sweetness and tartness. Some of the top choices include:
- Granny Smith: Tart and firm, holds its shape exceptionally well.
- Honeycrisp: Sweet with a satisfying crunch, though slightly softer when baked.
- Braeburn: Balanced sweetness and tartness with a firm texture.
- Jonagold: A cross between Jonathan and Golden Delicious, offering rich flavor.
For the best results, many bakers recommend mixing two or three varieties, such as Granny Smith and Honeycrisp, to combine tartness, sweetness, and texture in every bite.
Ingredients You’ll Need
For the Crust
- 2 ½ cups all-purpose flour
- 1 teaspoon salt
- 1 tablespoon sugar
- 1 cup (2 sticks) unsalted butter, cold and cubed
- 6–8 tablespoons ice water
For the Filling
- 6–7 cups peeled, sliced apples (about 3 pounds)
- ¾ cup granulated sugar
- ¼ cup brown sugar
- 2 tablespoons all-purpose flour or cornstarch
- 1 teaspoon ground cinnamon
- ¼ teaspoon ground nutmeg
- ¼ teaspoon salt
- 1 tablespoon lemon juice
- 2 tablespoons unsalted butter, cut into small pieces
For Finishing
- 1 egg, beaten (for egg wash)
- 1 tablespoon coarse sugar (optional, for sprinkling)
Step-by-Step Instructions
Step 1: Make the Pie Crust
In a large bowl, whisk together the flour, salt, and sugar. Add the cold, cubed butter and use a pastry cutter or your fingers to work it into the flour until the mixture resembles coarse crumbs with pea-sized pieces of butter remaining. Gradually add ice water, one tablespoon at a time, mixing gently until the dough just comes together.
Divide the dough into two discs, wrap each in plastic wrap, and refrigerate for at least one hour. This resting period is essential, as it relaxes the gluten and keeps the butter cold, which is the key to a flaky crust.
Step 2: Prepare the Apple Filling
While the dough chills, peel, core, and slice your apples into even, roughly quarter-inch-thick slices. In a large bowl, toss the apples with granulated sugar, brown sugar, flour, cinnamon, nutmeg, salt, and lemon juice until evenly coated. Let the mixture sit for about 15 minutes so the apples release some of their juices and the flavors meld together.
Step 3: Roll Out the Bottom Crust
On a lightly floured surface, roll one dough disc into a circle about 12 inches in diameter. Carefully transfer it to a 9-inch pie dish, pressing it gently into the bottom and sides. Trim any excess overhang to about an inch.
Step 4: Add the Filling
Pour the apple filling into the crust, mounding it slightly in the center. Dot the top with the small pieces of butter, which will melt into the filling as it bakes and add richness.
Step 5: Add the Top Crust
Roll out the second dough disc and place it over the filling. You can use a full sheet with slits cut for ventilation, or create a decorative lattice pattern by weaving strips of dough. Trim the edges, then fold and crimp them together to seal.
Step 6: Chill Before Baking
Place the assembled pie in the refrigerator for 20 to 30 minutes before baking. This helps the crust hold its shape and prevents excessive shrinking in the oven.
Step 7: Apply the Egg Wash
Brush the top crust with the beaten egg, then sprinkle with coarse sugar for a beautiful, crackly, golden finish.
Step 8: Bake
Preheat your oven to 425°F (220°C). Place the pie on a baking sheet to catch any drips, and bake for 20 minutes. Reduce the oven temperature to 375°F (190°C) and continue baking for another 35 to 45 minutes, until the crust is deep golden brown and the filling is bubbling through the vents.
If the edges start browning too quickly, cover them loosely with foil or a pie crust shield partway through baking.
Step 9: Cool Before Slicing
Let the pie cool on a wire rack for at least 2 to 3 hours before slicing. This resting time allows the filling to set, so your slices hold together instead of spilling out when cut.
Tips for the Perfect Apple Pie
- Keep everything cold. Cold butter and ice water are essential for a flaky, tender crust.
- Don’t overwork the dough. Overmixing develops gluten, resulting in a tough crust rather than a flaky one.
- Mix apple varieties. Combining tart and sweet apples creates more complex, balanced flavor.
- Use a thickener. Flour or cornstarch prevents a soupy filling and helps slices hold their shape.
- Let it cool fully. As tempting as it is to cut into a warm pie, patience results in cleaner, more attractive slices.
Common Mistakes to Avoid
- Skipping the resting period: Both the dough and the assembled pie need chill time for the best texture.
- Overfilling the pie: Too much filling can cause overflow and a soggy bottom crust.
- Not venting the top crust: Steam needs an escape route, or your crust may become soggy or split unevenly.
- Cutting too soon: Slicing before the pie has cooled leads to a runny, messy filling.
Final Thoughts
Making apple pie from scratch might take a bit of time and patience, but the results are well worth it. With a flaky, buttery crust and a perfectly spiced apple filling, this classic dessert is guaranteed to impress at any gathering. Once you master the basic technique, you can experiment with different apple blends, spice combinations, and crust designs to make the recipe your own.
What’s your favorite apple variety for pie? Share your go-to combination in the comments below!
